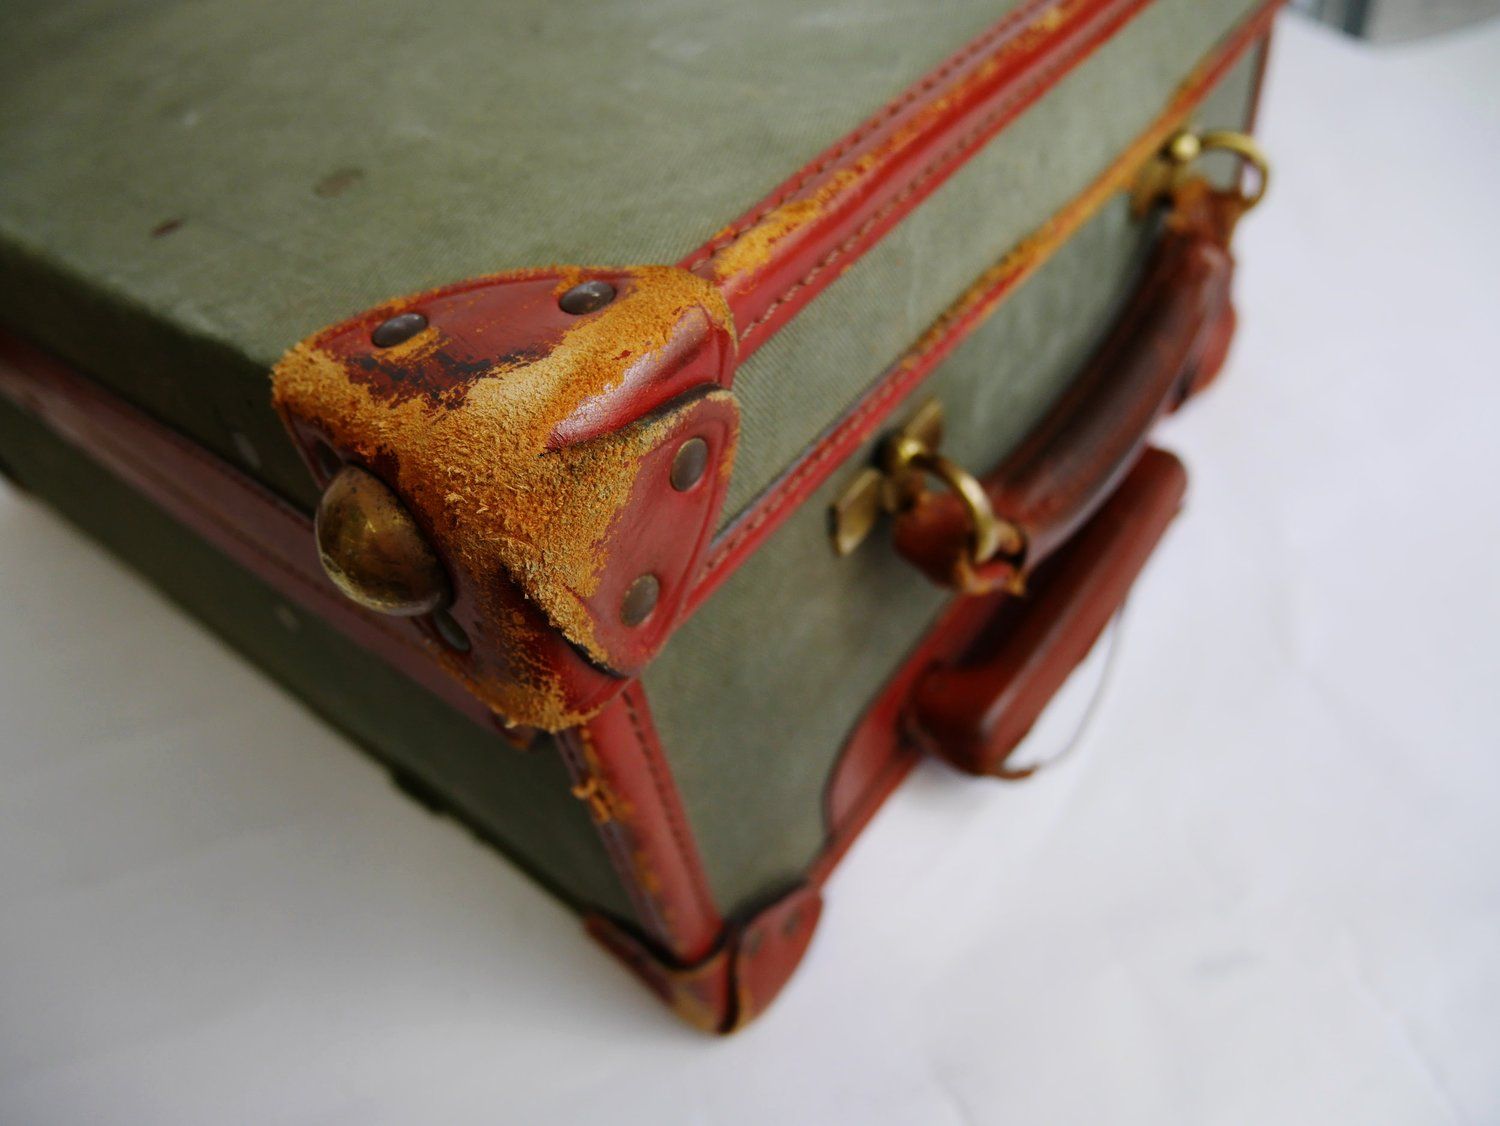
To clean an old suitcase, start by identifying its material and testing any cleaner on a hidden spot first. The only exception is if your suitcase has a lock that needs opening, like a locked Samsonite model, which you must handle before cleaning. Dust the exterior with a soft brush or vacuum, then use mild detergent and warm water for the interior, treating stains with a remover safe for the material and conditioning leather if applicable.
Step 1: Gathering Supplies
Before diving into the cleaning process, it's important to gather all the necessary supplies. Having everything at hand will make the cleaning process much more efficient. Here are the essential supplies you'll need:
- Soft-bristle brush or vacuum cleaner: This will be used to remove loose dirt and dust from the surface of the suitcase. A soft-bristle brush or a vacuum cleaner with a brush attachment can help you effectively clean the exterior without scratching or damaging the material.
- Mild detergent: You'll need a gentle detergent or soap to clean the interior lining of the suitcase. Avoid using harsh chemicals or abrasive cleaners, as they may damage the fabric or leave behind residue.
- Warm water: Fill a bucket or basin with warm water, as it will be used in combination with the detergent for cleaning the interior and exterior of the suitcase.
- Clean, lint-free cloths: These will be used to wipe down the surface of the suitcase, as well as to dry it after cleaning. Choose cloths that are soft and lint-free to avoid leaving behind any fibers or lint on the material.
- Stain remover: If your old suitcase has stubborn stains, you may need a stain remover specifically designed for the material of your suitcase. Ensure that the stain remover is safe to use on the fabric, leather, or other materials of your suitcase.
- Leather conditioner: If your old suitcase is made of leather, it will need some extra care and conditioning. Choose a leather conditioner that is suitable for the type of leather used in your suitcase to restore its suppleness and prevent cracking.
- Small brush or cotton swabs: These tools are useful for cleaning small nooks and crannies, such as the crevices around latches or locks. Use a soft-bristle brush or cotton swabs dipped in soapy water to remove dirt and grime from these hard-to-reach areas.
- Optional: Odor absorber: If your old suitcase has a musty or unpleasant odor, you may want to consider using an odor absorber to freshen it up. Baking soda can help eliminate unwanted smells.
By gathering these supplies, you'll have everything you need to tackle the cleaning process and restore your old suitcase to its former beauty. Now that we have our supplies ready, it's time to start cleaning the exterior of the suitcase.
Step 2: Dusting the Exterior
Before delving into deep cleaning, it's important to start by removing loose dirt and dust from the exterior of your old suitcase. This step will prevent dirt particles from spreading or scratching the surface during the cleaning process. Here's how to effectively dust the exterior:
- Inspect the surface: Carefully examine the exterior of the suitcase to identify any areas with visible dust, dirt, or debris. Pay attention to corners, seams, and hard-to-reach spots where dirt tends to accumulate.
- Brush away loose dirt: Use a soft-bristle brush or a vacuum cleaner with a brush attachment to gently brush away the loose dirt from the surface. Start at the top of the suitcase and work your way down, applying light pressure to avoid damaging the material.
- Pay attention to corners and crevices: Use a small brush or cotton swabs dipped in soapy water to clean any dirt or dust trapped in the corners, seams, or crevices of the suitcase. Be thorough but gentle, ensuring you don't scrub too vigorously.
- Wipe down the surface: Take a clean, lint-free cloth and dampen it with warm water and a small amount of mild detergent. Gently wipe down the entire exterior of the suitcase, removing any remaining dirt or dust. Use circular motions and pay extra attention to stained or heavily soiled areas.
- Dry the surface: After wiping down the surface, use a dry, lint-free cloth to thoroughly dry the exterior of the suitcase. This step is crucial to prevent water spots or damage to the material.
By dusting the exterior of your old suitcase, you'll create a clean foundation for the deeper cleaning steps that follow. Remember to be mindful of the material of your suitcase and avoid using excessive force or abrasive materials that could cause damage. If your suitcase has a musty smell, baking soda can help eliminate unwanted smells once the exterior is clean. Now that the exterior is dust-free, let's move on to cleaning the interior of the suitcase.
Step 3: Cleaning the Interior
After tackling the exterior of the old suitcase, it's time to focus on cleaning its interior. Over time, the interior lining can accumulate dust, dirt, and even unwanted odors. Here's how you can effectively clean the interior of your old suitcase:
- Empty the contents: Start by removing all items from the interior of the suitcase. This includes any clothing, accessories, or personal belongings that may be stored inside. Set them aside in a safe place while you clean.
- Vacuum or shake out loose debris: Use a vacuum cleaner with a soft brush attachment to carefully vacuum the interior lining of the suitcase. If a vacuum cleaner is not available, you can gently shake out the loose debris outdoors or over a trash bin.
- Spot clean stains: If you notice any stains on the interior lining, mix a small amount of mild detergent with warm water. Dip a clean cloth or sponge into the soapy solution and gently dab at the stains, avoiding soaking the fabric.
- Wipe down the interior: Take a clean cloth dampened with warm water and mild detergent and wipe down the entire interior of the suitcase. This will remove any remaining dirt, dust, or stains. Pay attention to corners, seams, and pockets where grime can accumulate.
- Rinse and wring out the cloth: After wiping, rinse the cloth thoroughly with clean water and wring out any excess liquid. Use the damp cloth to wipe away any soapy residue left behind on the interior lining.
- Dry the interior: Allow the interior of the suitcase to air dry completely before placing any items back inside. If needed, you can use a fan or open windows to help speed up the drying process.
For musty smells that linger after cleaning, baking soda can help eliminate unwanted smells. Sprinkle a light layer of baking soda over the dry interior, leave it for several hours or overnight, then vacuum it up thoroughly. This simple step refreshes the lining without harsh chemicals. Once the interior has dried completely, it's time to address stubborn stains that may require additional treatment.
Step 4: Removing Stains
Stains can often pose a challenge when it comes to cleaning an old suitcase. However, with the right techniques and products, you can effectively tackle stubborn stains and restore the appearance of your suitcase. Here's how to remove stains from your old suitcase:
- Identify the type of stain: Before treating a stain, it's important to determine the type of stain and the material of your suitcase. Different types of stains, such as ink, oil, or beverage spills, may require specific cleaning methods or stain removers.
- Test stain remover: Before applying any stain remover directly to the stained area, test it on a small, inconspicuous area of the suitcase to ensure it does not cause discoloration or damage.
- Apply stain remover: If the stain remover passes the test, apply a small amount to a clean cloth or sponge. Gently blot the stained area, being careful not to scrub or rub vigorously.
- Allow the stain remover to sit: Let the stain remover sit on the stain for the recommended amount of time, as indicated on the product's instructions. This will allow the stain remover to penetrate and lift the stain.
- Blot and rinse: After the designated time, blot the treated area with a clean cloth or sponge, removing as much of the stain as possible. Rinse the cloth or sponge with clean water and gently blot the area to remove any residue from the stain remover.
- Repeat if necessary: If the stain is still visible, you may need to repeat the stain removal process. Be patient and persistent, as some stains may require multiple treatments to completely disappear.
- Dry thoroughly: Once the stain has been successfully removed, ensure that the area is completely dry before proceeding to the next step. This will prevent any moisture from causing new stains or damage.
Baking soda can help eliminate unwanted smells that sometimes accompany old stains, so after drying, sprinkle a light layer over the affected area and let it sit for a few hours before vacuuming it off. By following these steps, you can effectively remove stubborn stains from your old suitcase. Remember to always use caution when applying stain removers and to test them on a small, hidden area first. Now that we've tackled the stains, let's move on to preserving and treating the leather and handles of your old suitcase.
Step 5: Treating Leather and Handles
If your old suitcase features leather accents or handles, give them special attention to keep them in good condition. Leather requires regular maintenance to stay supple and prevent drying or cracking. Here's how to treat the leather and handles effectively:
- Clean the leather: Gently wipe down the leather areas with a clean cloth dampened with warm water and mild detergent. This removes surface dirt or stains.
- Apply leather conditioner: Once the leather is clean and dry, apply a small amount of leather conditioner to a soft cloth. Gently rub it onto the leather, focusing on dry or cracked areas. Follow the product instructions for application and drying time.
- Allow the conditioner to soak in: Let the conditioner soak into the leather for the recommended time. This nourishes the leather and restores natural oils.
- Buff the leather: Use a clean cloth to buff the leather after it has soaked. This removes excess conditioner and gives a polished look.
- Clean the handles: If the handles are leather, clean them the same way. For plastic or metal handles, use a damp cloth with mild detergent to wipe away dirt and grime. If your suitcase has a combination lock, you may need to know how to reset 3 digit lock on American Tourister luggage to access all areas while cleaning.
- Protect the leather: To prevent future damage, consider applying a leather protector or water repellent spray. Ensure the product suits your leather type and follow the instructions. Baking soda can help eliminate unwanted smells if mustiness develops later.
Following these steps keeps leather and handles in good condition and extends the suitcase's lifespan. Regularly clean and condition the leather to maintain its appearance and prevent drying. If your luggage has a lock mechanism, ensure it stays dry during cleaning to avoid issues—you might need to know how to unlock a locked Samsonite suitcase if moisture causes problems.
Step 6: Restoring Latches and Locks
The latches and locks on your old suitcase play a crucial role in keeping your belongings secure during travels. Over time, they can become rusty, stiff, or difficult to operate. Here's how to effectively restore the latches and locks of your old suitcase:
- Inspect the latches and locks: Take a close look at the latches and locks of your old suitcase to identify any signs of rust, corrosion, or damage. Ensure that they are functioning properly and that the mechanisms are not jammed or misaligned.
- Remove rust and dirt: If you notice any rust or dirt buildup on the latches or locks, gently clean them using a soft cloth dampened with warm water and mild detergent. Gently scrub the affected areas to remove any stubborn stains or debris.
- Lubricate the mechanisms: Apply a small amount of lubricant, such as WD-40 or a silicone-based lubricant, to the moving parts of the latches and locks. This will help loosen any stiff or rusty components and ensure smooth operation. Avoid using excessive amounts of lubricant, as it can attract dust and dirt.
- Work the mechanisms: After applying lubricant, work the latches and locks by opening and closing them several times. This will help distribute the lubricant and loosen up any stuck or stiff parts.
- Check alignment: Ensure that the latches align properly with their corresponding locks when closed. If they are misaligned, gently adjust them to ensure a secure fit. If you have a combination lock and need to reset it, the process is similar to what you'd do to reset a 3 digit lock on American Tourister luggage.
- Replace damaged parts: If you notice any damaged or broken parts, such as missing screws or bent latches, consider replacing them with suitable replacements. Check with the manufacturer or consult a professional to ensure you obtain the correct parts for your specific suitcase model.
By following these steps, you can effectively restore the latches and locks of your old suitcase, ensuring they function properly and provide secure closures. Regular maintenance and lubrication will help prevent future issues and extend the lifespan of these important components. Baking soda can help eliminate unwanted smells if mustiness has set into the lock area. Now, if your old suitcase has any tears or damage, let's move on to repairing them in the next step.
Step 7: Repairing Tears or Damage
Over time, your old suitcase may develop tears, scratches, or other forms of damage that compromise its structural integrity and appearance. Repairing these issues will improve both functionality and aesthetic appeal. Here's how to effectively repair tears or damage:
- Assess the damage: Carefully examine the extent of the tear or damage. Determine whether it can be repaired at home or if it requires professional assistance.
- Repair small tears: For small tears or rips in the fabric or lining, use a needle and thread with a matching thread color. Stitch the torn edges together using a basic sewing technique. Ensure stitches are secure, but do not pull them too tightly, as this may cause further damage to the fabric.
- Use fabric patch or adhesive: For larger tears or damaged areas, use a fabric patch or adhesive designed specifically for luggage repair. Cut a piece of fabric or patch larger than the damaged area and adhere it to the inside of the suitcase, following the product instructions. This provides additional reinforcement and creates a seamless appearance.
- Repair straps or handles: If straps or handles are damaged or detached, assess if they can be reattached or replaced. Some straps or handles have screws or bolts that can be easily tightened or replaced. Consult the manufacturer or a professional if you require replacement parts or more advanced repairs.
- Address structural issues: Significant structural damage, such as a broken frame or bent corners, may require professional repair. Consult a luggage repair specialist who can assess the damage and provide appropriate solutions.
By following these steps, you can effectively repair minor tears and damage in your old suitcase. For more extensive repairs, professionals ensure proper restoration and preservation. After addressing tears, you might also consider whether your suitcase size fits under an airline seat for future travel convenience. Now that we've addressed the repairs, let's move on to adding the finishing touches to your old suitcase.
Step 8: Adding Finishing Touches
Now that you have cleaned, repaired, and restored your old suitcase, it's time to add the finishing touches to enhance its overall appearance and functionality. These final touches will give your suitcase a polished and like-new look. Here's how to add the finishing touches:
- Polish metal hardware: If your suitcase has metal hardware, such as locks, latches, or buckles, give them a gentle polish using a metal cleaner or a mixture of vinegar and water. This will help remove any tarnish or rust and restore their shine.
- Replace worn-out or damaged accessories: If your old suitcase had accessories, such as luggage tags or straps, that are worn-out or damaged, consider replacing them with new ones. This will not only improve the functionality of your suitcase but also give it a fresh and updated look.
- Personalize with luggage stickers or patches: Add a personal touch to your old suitcase by decorating it with luggage stickers or patches that reflect your style or travel destinations. This can make your suitcase unique and easily recognizable, while also adding a playful charm.
- Use fabric spray or air freshener: To keep your suitcase smelling fresh, consider using a fabric spray or air freshener with a pleasant scent. Lightly spray the interior of the suitcase or place a scented sachet inside to keep unwanted odors at bay. Baking soda can help eliminate unwanted smells—sprinkle a light layer inside, leave it overnight, and vacuum it out the next day.
- Label your suitcase: Attach a luggage tag with your name and contact information to your suitcase to ensure it can be easily identified in case it gets lost or misplaced during travels. This will also add a practical and personalized touch to your luggage.
- Store your suitcase properly: When you're not using your old suitcase, store it in a cool, dry place away from direct sunlight to prevent fading or damage. Cover it with a dust cover or a clean cloth to protect it from dust and dirt.
By adding these finishing touches, you can complete the restoration process of your old suitcase and ensure it is ready for future travels or display. Remember to personalize your suitcase to make it uniquely yours and to properly store it to maintain its condition. Now that you've added the finishing touches, your old suitcase is ready to accompany you on new adventures!
Conclusion
You’ve now restored your old suitcase, reviving both its appearance and function. Throughout the process, you’ve covered dusting the exterior, cleaning the interior, removing stains, treating leather and handles, restoring latches and locks, repairing tears, and adding finishing touches. Baking soda can help eliminate unwanted smells, so sprinkle it inside before storing the case.
To keep your suitcase in top shape, make cleaning a habit after every trip and store it properly to avoid dust and damage. If you ever need to access the wheels or compartments, remember that some locks—like those on a Samsonite—may require you to unlock a locked Samsonite suitcase using the factory reset method. For American Tourister models, you can reset 3 digit lock on American Tourister luggage by following the manufacturer’s instructions.
With regular care, your vintage piece will stay ready for future journeys. Its history and charm now pair with a refreshed look, so pack your belongings and head out—whether you’re checking a bag or ensuring your suitcase size fits under an airline seat, your restored companion is ready for the road.