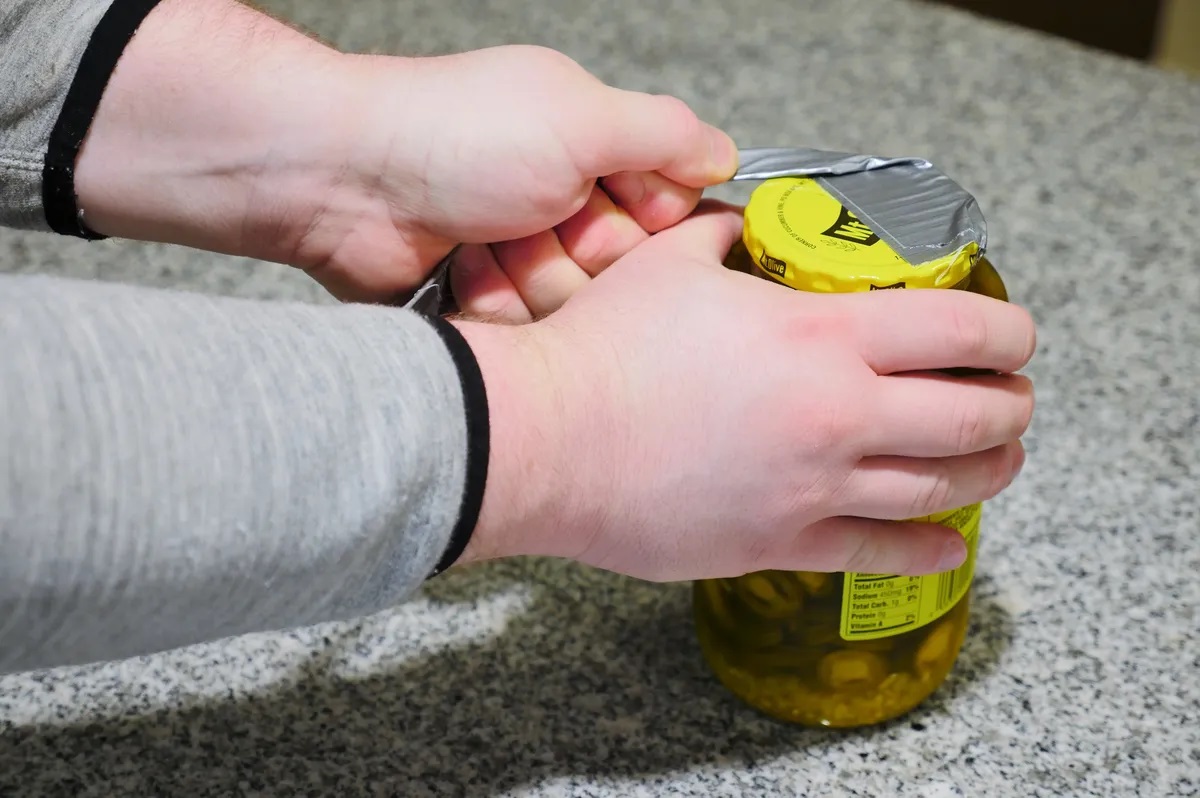
To open a stuck bottle cap, apply heat from warm water or a hairdryer to expand the metal or plastic. However, this method works best for caps stuck by humidity or pressure build-up, not for bottles with faulty or worn threads. If heat doesn’t do the trick, rubber gloves or gripping tools like pliers can provide the extra leverage needed to twist it free.
Common Causes of Stuck Bottle Caps
Before delving into the various methods to open a stuck bottle cap, it's crucial to understand the common causes behind this frustrating situation. By identifying the root cause, you can approach the problem with the appropriate solution. Here are some of the most common causes of stuck bottle caps:
- Excessive tightening: Sometimes, bottle caps are sealed extremely tightly during the manufacturing process or by previous users. This can make them difficult to open, especially if you don't have enough grip or leverage.
- Humidity: High levels of humidity can cause the metal or plastic of the bottle cap to expand, making it stick to the thread of the bottle. This is especially common in environments with a lot of moisture, such as a bathroom or a coastal area.
- Faulty bottle caps: Occasionally, bottle caps may be defective or damaged, making them harder to open. This can occur if the cap is not properly aligned with the bottle or if the seal inside the cap is compromised.
- Pressure build-up: Certain beverages, such as carbonated drinks or beers, can create pressure inside the bottle. If this pressure is not released before attempting to open the bottle, it can cause the cap to become stuck.
- Wear and tear: Over time, the threads on the bottle and the cap can wear down, leading to a tighter seal. This is particularly true for reusable bottles that have been used repeatedly.
By understanding these common causes, you can effectively choose the appropriate method to open a stuck bottle cap. Now, with the causes outlined, let's explore the tools and materials you'll need to successfully tackle this challenge.
Tools and Materials Needed
Opening a stuck bottle cap requires a few essential tools and materials to ensure success without causing any damage. Here's a list of what you'll need:
- Heat source: You'll need access to a heat source, such as warm water or a hairdryer. Applying warm water to the cap only for a short time can expand the metal or plastic slightly, making it easier to open.
- Rubber gloves: Having a pair of rubber gloves provides you with a better grip on the bottle cap, making it easier to twist and open.
- Gripping tools: Various gripping tools, such as pliers, adjustable wrenches, or rubber jar openers, can help you get a better grip on the bottle cap and provide the leverage needed to open it.
- Bottle opener or spoon: A bottle opener or a spoon can be utilized to pry open the bottle cap by using it as a lever.
- Freezer (use caution): Freezing the bottle may help contract the metal or plastic, but use caution as it can affect the contents or cause glass to break. If you choose to try freezing, place the entire bottle upright in the freezer for a short time, but avoid freezing the contents solid. Remove the chilled bottle and attempt to twist open the cap. If still stuck, run the bottle under warm water for a few seconds to help loosen it.
It's important to note that not all tools or materials may be necessary for every method of opening a stuck bottle cap. Depending on the cause and severity of the situation, you can choose the most suitable tool or combination of tools to successfully open the bottle. Now that you have a list of the tools and materials needed, let's move on to the step-by-step methods to tackle that stubborn bottle cap!
Method 1: Applying Heat
One effective method to open a stuck bottle cap is by applying heat. By subjecting the bottle cap to heat, you can cause the metal or plastic to expand slightly, making it easier to twist open. Here's how you can do it:
- Fill a bowl or a sink with warm water. Make sure the water is warm, but not hot, as excessive heat can damage the bottle or the contents inside.
- Run warm water over the stuck bottle cap only for a short time. This will allow the heat to penetrate and expand the cap.
- Using a rubber glove or a towel to protect your hand, firmly grip the cap.
- Try to twist the cap counterclockwise to open it. The heat should have made it easier to break the seal and loosen the cap.
- If the cap is still stuck, repeat the process by running warm water over the cap again and try again.
If the warm water method doesn't work, you can also try using a hairdryer to apply gentle heat to the bottle cap. Hold the hairdryer a few inches away from the cap and move it around in a circular motion to evenly distribute the heat. Again, use a rubber glove or a towel to protect your hand and try twisting the cap open. Be cautious not to overheat the cap, as excessive heat can damage the bottle or cause burns.
If Method 1 doesn't do the trick, don't worry! We have several more methods to explore. Let's move on to Method 2: Using Rubber Gloves.
Method 2: Using Rubber Gloves
If applying heat didn't work or if you don't have access to a heat source, another effective method to open a stuck bottle cap is by using rubber gloves. Rubber gloves provide added grip and leverage, making it easier to twist and open the stubborn cap.
- Put on a pair of rubber gloves. The rubber material helps you get a better grip on the bottle cap.
- Hold the bottle firmly with one hand, making sure it's stable and won't slip.
- With your other hand wearing the rubber glove, firmly grip the stuck bottle cap.
- Apply steady pressure and try to twist the cap counterclockwise. The rubber glove enhances your grip and provides the necessary traction to open the cap.
- If the cap is still stuck, try using a rubber band for additional grip. Wrap a rubber band tightly around the cap and then twist it counterclockwise. This gives you extra leverage and traction to open the bottle.
If Method 2 doesn't yield the results you desire, there are more methods to explore. Let's proceed to Method 3: Utilizing Gripping Tools.
Method 3: Utilizing Gripping Tools
If you're still struggling to open a stuck bottle cap, utilizing gripping tools can provide the extra leverage and strength needed to conquer the stubborn cap. Gripping tools such as pliers, adjustable wrenches, or rubber jar openers can help you get a better grip on the cap and make it easier to twist open. Follow these steps to try this method:
- Select a suitable gripping tool from your toolbox or kitchen drawer. Pliers, adjustable wrenches, or rubber jar openers are often effective choices.
- Hold the bottle firmly with one hand to keep it stable and prevent it from slipping.
- With your other hand, use the gripping tool to firmly grasp the stuck bottle cap. Make sure to position the tool as close to the edge of the cap as possible for maximum leverage.
- The additional strength and grip provided by the tool should make it easier to break the seal and open the bottle.
- If the cap is still resistant, you can try using a cloth or towel between the tool and the cap. This can provide extra friction and prevent the tool from slipping.
Remember to be cautious when using gripping tools, as excessive force or improper use may damage the bottle or cause injury. If Method 3 doesn't do the trick, there are more methods to explore. Let's move on to Method 4: Using a Bottle Opener or Spoon.
Method 4: Using a Bottle Opener or Spoon
When all else fails, you can turn to a trusty bottle opener or even a spoon as a last resort to open a stubborn bottle cap. While unconventional, these tools can provide the leverage needed to break the seal and pop open the bottle. Follow these steps to give it a try:
- Choose either a bottle opener or a spoon as your tool of choice. Make sure it's sturdy and capable of exerting force.
- Position the edge of the bottle opener or the curved part of the spoon underneath the lip of the stuck bottle cap.
- Apply upward pressure on the tool, using it as a lever to pry the cap upwards and away from the bottle.
- Continue to apply pressure and twist the tool counterclockwise, gradually working your way around the cap. This should break the seal and loosen the cap.
- Once the seal is broken, you can use your fingers to twist the cap off the rest of the way.
While using a bottle opener or spoon may require a bit more effort and precision, it can often do the trick when other methods fail. Just remember to be cautious and apply gradual force to avoid damaging the bottle or hurting yourself. If Method 4 doesn't work, there's one more method to explore. Let's move on to Method 5: Freezing the Bottle. If you need to open a stubborn cap on a travel-sized bottle, the same technique works for items like a Dawn Powerwash bottle.
Method 5: Freezing the Bottle
If all else has failed, you can try freezing the bottle to loosen a stubborn bottle cap.
- Ensure that the bottle is securely capped to prevent any leakage.
- If you choose to try freezing, place the entire bottle in the freezer, making sure it is positioned upright to avoid spilling the contents.
- Let the bottle chill for a short time, but avoid freezing the contents solid.
- Remove the chilled bottle from the freezer and attempt to twist open the cap.
- If the cap is still stuck, you can try running the bottle under warm water for a few seconds to help loosen it.
- Apply firm pressure and twist the cap counterclockwise. The contrast between the contracted cap and the slightly thawed bottle may help break the seal and allow you to open the bottle.
It's important to note that freezing the bottle can affect the taste and texture of certain beverages, so take this into consideration before using this method. Additionally, using glass bottles in the freezer carries the risk of shattering due to expansion, so it's best to utilize freezer-safe plastic or metal containers.
With Method 5, you've explored various techniques to open a stuck bottle cap. Remember to exercise caution and use appropriate tools and methods to avoid any accidents or damage to the bottle or yourself. Cheers to finally enjoying your favorite beverage!
Conclusion
Opening a stuck bottle cap can be a frustrating experience, but with the right knowledge and techniques, you can overcome this challenge with ease. Throughout this article, we have explored various methods to help you open stubborn bottle caps. From applying warm water and using rubber gloves to utilizing gripping tools, employing a bottle opener or spoon, and even chilling the bottle, these methods provide practical solutions for a variety of situations.
It's important to remember that patience and caution are key. Run warm water over the stuck bottle cap only for a short time to expand it slightly.
Now armed with the knowledge to open stuck bottle caps, you can approach any locked bottle with confidence. Whether it's a twist-off cap or a tightly sealed cork, you have the tools to handle the situation.
Happy bottle opening!
Related travel guides: How To Open A Bottle With A Spoon and How To Open A Bottle With A Knife.