How To Add A Cup Holder To A Kayak
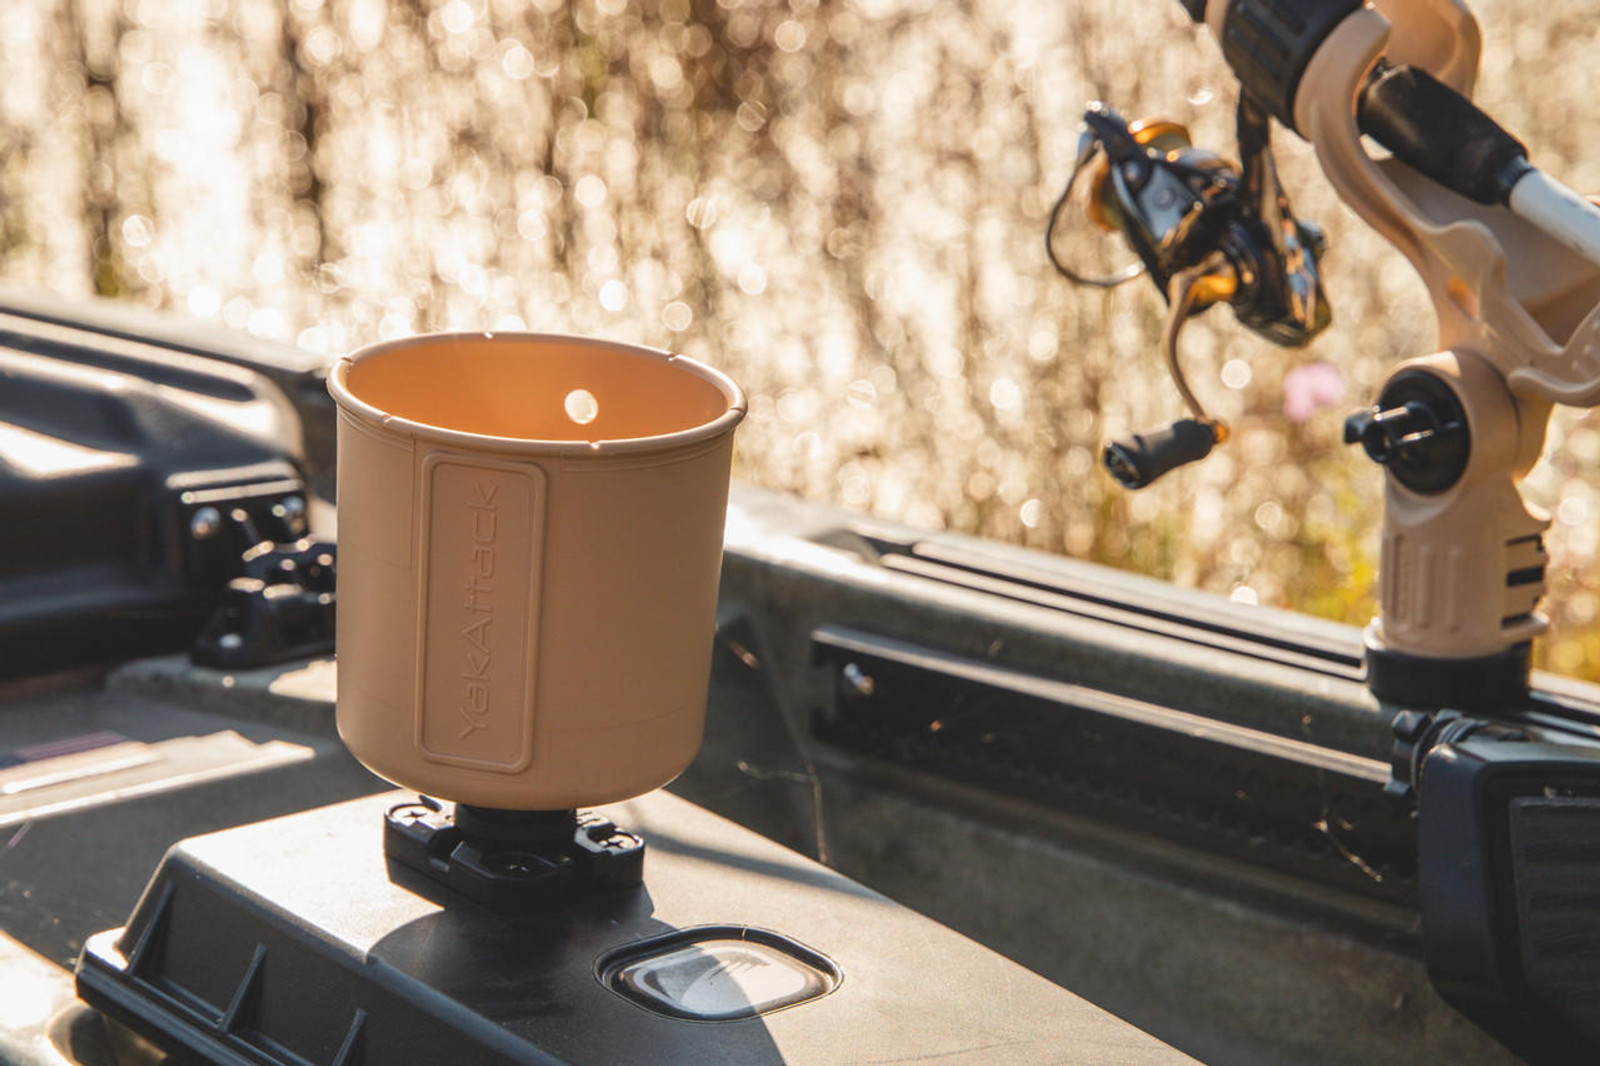
Introduction
Kayaking is a fantastic outdoor activity that allows you to explore the beauty of nature while getting a great workout. Whether you’re embarking on a peaceful lake adventure or tackling challenging whitewater rapids, having a refreshing beverage by your side can make the experience even more enjoyable. That’s where a cup holder for your kayak comes in handy.
A cup holder is a simple yet essential accessory that allows you to conveniently keep your beverages within reach while paddling. It ensures that your drink stays secure and prevents spills, allowing you to stay hydrated and focused on your journey. Adding a cup holder to your kayak is a relatively straightforward process that can greatly enhance your kayaking experience.
In this guide, we will walk you through the steps to add a cup holder to your kayak. We will cover everything from selecting the right materials and tools to securing the cup holder in place. So let’s dive in and get your kayak equipped with this must-have accessory!
Materials and Tools Needed
Before you start the process of adding a cup holder to your kayak, it’s important to gather all the necessary materials and tools. Here’s a list of what you’ll need:
- High-quality kayak cup holder: Look for a cup holder specifically designed for kayaks. It should be durable, waterproof, and capable of securely holding your beverages.
- Mounting bracket: This is the component that attaches the cup holder to your kayak. Ensure that it is compatible with both the cup holder and your kayak’s surface.
- Measuring tape: You’ll need a measuring tape to accurately determine the placement of the cup holder.
- Pencil or marker: Use these to mark the positions for drilling and attaching the mounting bracket.
- Drill: A power drill with the appropriate drill bit will be needed to create holes in your kayak’s surface.
- Screwdriver or wrench: Depending on the type of mounting bracket, you may need a screwdriver or wrench to secure it in place.
- Cleaning solution and cloth: Before installation, clean the kayak’s surface to ensure proper adhesion of the mounting bracket.
- Adhesive or mounting hardware: Depending on the type of mounting bracket, you may need adhesive or mounting hardware (such as screws or bolts) to secure it to your kayak.
Having these materials and tools ready beforehand will make the installation process smoother and more efficient. Now that you have everything you need, let’s proceed to the next steps.
Step 1: Determine the Placement of the Cup Holder
The first step in adding a cup holder to your kayak is to determine the ideal placement for it. This will ensure that it is accessible and doesn’t interfere with your paddling or navigation.
Start by sitting in your kayak in the position you typically paddle in. Take into account factors such as your arm reach, comfort, and ease of access. Consider whether you want the cup holder within arm’s reach or slightly further away.
Next, use a measuring tape to measure the distance between your position and the area where you want the cup holder to be placed. Mark the desired position with a pencil or marker. Make sure the location is easily reachable without straining your body or affecting your balance.
Keep in mind any other accessories you may have on your kayak, such as a GPS device or fishing rod holder. Ensure that the cup holder placement doesn’t interfere with these accessories or obstruct your movement.
Additionally, consider the size and shape of your kayak. Some kayaks have recessed areas or built-in holders that can accommodate a cup holder, while others may require a mounting bracket to be attached to a flat surface.
Remember, the goal is to find a location where the cup holder is easily accessible and doesn’t hinder your paddling or compromise your safety on the water. Once you have determined the placement, you’re ready to move on to the next step.
Step 2: Prepare the Kayak Surface for Installation
After determining the placement of your cup holder, it’s important to prepare the kayak surface before installing the mounting bracket. Preparing the surface will ensure proper adhesion and a secure attachment.
First, thoroughly clean the area where you will be attaching the mounting bracket. Use a cleaning solution suitable for your kayak’s material and a cloth to remove any dirt, debris, or residue. This will create a clean surface for better adhesion and prevent any potential damage to your kayak.
Next, if your kayak has a recessed area or designated cup holder slots, check to see if they align with your desired placement. If they do, you can skip this step and proceed to the next one. If not, continue to prepare the surface.
For kayaks with a flat surface, you may need to create a mounting location. Using a pencil or marker, mark the spots where the mounting bracket will be attached. Ensure that the markings are accurate and aligned with the desired placement determined earlier.
Before proceeding, double-check the placement and markings to make sure they are correct. Once you’re confident in the position and the surface is free of debris, you’re ready to move on to installing the mounting bracket in the next step.
Step 3: Attach the Mounting Bracket
With the kayak surface prepared, it’s time to attach the mounting bracket that will hold the cup holder in place.
Start by aligning the mounting bracket with the markings you made in the previous step. Place the bracket on the kayak surface and ensure it is level and straight. Use a pencil or marker to mark the screw or bolt holes on the kayak through the mounting bracket holes.
Once marked, set the mounting bracket aside and grab your drill with the appropriate drill bit. Carefully drill holes on the marked spots. Make sure to use a drill bit size that matches the diameter of the screws or bolts that came with the mounting bracket.
After drilling the holes, clean any debris or dust from the newly drilled holes to ensure a proper fit for the screws or bolts. Then, place the mounting bracket back on the kayak surface and align the holes in the bracket with the drilled holes.
Now, you can insert the screws or bolts through the bracket and into the drilled holes. Use a screwdriver or wrench to tighten them securely. Be careful not to overtighten and risk damaging the kayak surface.
Once the screws or bolts are tightly fastened, give the mounting bracket a gentle tug to make sure it is firmly attached to the kayak.
With the mounting bracket securely in place, you’re ready to move on to the next step of positioning and securing the cup holder.
Step 4: Position and Secure the Cup Holder
Now that the mounting bracket is securely attached to your kayak, it’s time to position and secure the cup holder.
Begin by placing the cup holder onto the mounting bracket and ensuring that it fits properly. Adjust the position of the cup holder to align it with the desired placement you determined earlier. Make sure it is level and parallel to the kayak’s surface.
Depending on the type of cup holder and mounting bracket you have, you may need to use adhesive or additional mounting hardware to secure the cup holder to the bracket.
If your cup holder is designed to be attached with adhesive, carefully follow the manufacturer’s instructions for proper application. Apply the adhesive to the designated areas on the cup holder and press it firmly onto the mounting bracket. Allow the adhesive to dry and cure as per the instructions provided.
Alternatively, if your cup holder requires additional mounting hardware, refer to the instructions that came with the product. Typically, this involves using screws or bolts to secure the cup holder to the mounting bracket. Place the screws or bolts into the designated holes on the cup holder and attach them tightly using a screwdriver or wrench.
Once the cup holder is securely in place, give it a gentle tug or shake to ensure it is firmly attached and won’t come loose during your kayaking adventures.
Take a moment to admire your newly installed cup holder, ready to keep your favorite beverage within easy reach as you paddle away.
Now, let’s move on to the final step of testing and adjusting the cup holder position for optimal convenience.
Step 5: Test and Adjust the Cup Holder Position
With the cup holder securely in place, it’s time to test its functionality and make any necessary adjustments.
Start by placing a beverage of your choice in the cup holder. Ensure that it fits snugly and doesn’t wobble or feel unstable. Give the kayak a gentle shake to simulate the motion of paddling and see if the cup holder keeps your drink secure. If the cup holder feels loose or the beverage moves around excessively, you may need to tighten the mounting hardware or reapply adhesive if necessary.
Next, sit in your kayak in a paddling position and attempt to reach the cup holder. Take note of any difficulties or discomfort you may encounter. If the cup holder feels too far away or too close, or if it hinders your paddling stroke, you may need to adjust its position.
To adjust the cup holder’s position, follow these steps:
- Loosen the mounting hardware or remove the adhesive holding the cup holder in place.
- Reposition the cup holder to a more comfortable and accessible location.
- Secure the cup holder again by tightening the mounting hardware or reapplying adhesive as necessary.
- Test the cup holder once more to ensure that it is now in the ideal position.
Repeat this process as needed until you find the optimal position that allows for easy access to your drink without interfering with your paddling technique or comfort.
Remember, everyone’s preferences and kayaking style may differ, so don’t hesitate to experiment with the cup holder’s placement until you find what works best for you.
Congratulations! You have successfully added a cup holder to your kayak, enhancing your kayaking experience with the convenience of having a refreshing beverage at your fingertips.
Now, grab your paddle, strap on a life jacket, and head out to enjoy your next kayaking adventure with your new cup holder!
Conclusion
Adding a cup holder to your kayak is a simple and worthwhile modification that can greatly enhance your kayaking experience. With a cup holder, you can keep your beverages within easy reach, stay hydrated during your paddling adventures, and enjoy a refreshing drink while taking in the beauty of nature.
In this guide, we’ve walked you through the step-by-step process of adding a cup holder to your kayak. From determining the ideal placement to attaching the mounting bracket and securing the cup holder, we’ve covered everything you need to know.
Remember to gather all the necessary materials and tools, carefully prepare the kayak surface, and follow the instructions provided with your cup holder and mounting bracket. Take the time to test and adjust the cup holder’s position to ensure optimal access and comfort during your kayaking trips.
Now that you have a cup holder installed on your kayak, you can enjoy the convenience of having your favorite beverage at arm’s reach while paddling through calm waters or navigating challenging rapids.
So, why wait? Get out there, embark on your next kayaking adventure, and make the most of your time on the water with a handy cup holder by your side.